Inquiry
Form loading...

7 Tips for Choosing Pigment Powder for Resin

Choosing Pigment Powder For Resin is more technical than matching a color chart.

The global epoxy resin market continues to expand across crafts, coatings, electronics, and construction. Grand View Research reported an estimated market value of about USD 12 billion in 2022, with continued growth expected through 2030. This expansion increases demand for stable, compatible, and finely dispersed pigments. However, market growth does not guarantee better results. A bright sample can still cure unevenly, settle quickly, or weaken a translucent casting.

Color performance depends on particle size, surface treatment, resin chemistry, loading level, and mixing technique. Experienced makers often test a small batch first. That step prevents expensive failures. A pigment that works in epoxy may behave differently in polyurethane or UV resin. Temperature also matters. A warm workshop can reduce viscosity and accelerate settling.

Dr. Mas Subramanian, a leading materials scientist known for developing new inorganic pigments, said, “Color is one of the most powerful tools we have to communicate.” His observation applies directly to resin work. Color must remain attractive, but performance deserves equal attention.

This guide presents seven practical tips for evaluating Pigment Powder For Resin. It considers dispersion, opacity, lightfastness, curing behavior, safety documentation, and supplier reliability. The advice reflects common formulation principles and relevant quality practices, including particle testing and batch consistency. Still, no universal pigment exists. That is the uncomfortable part. Your resin system, mold depth, and desired finish may change the result. Test before committing. Small details often decide whether a casting looks professional or merely acceptable.
7 Tips for Choosing Pigment Powder for Resin

What Pigment Powder Is and How It Behaves in Resin

7 Tips for Choosing Pigment Powder for Resin

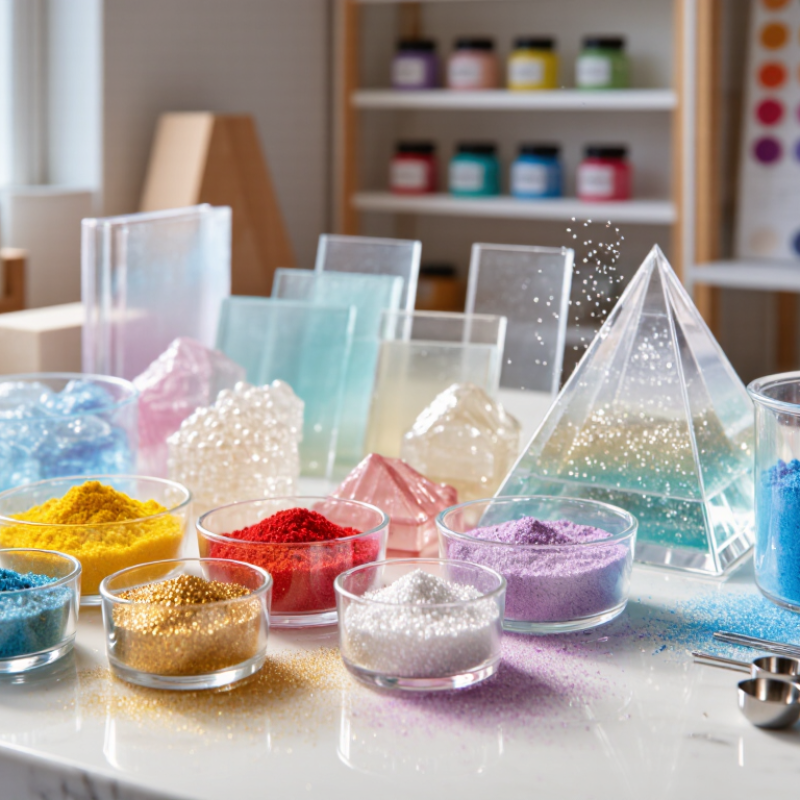
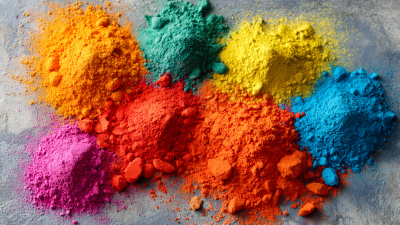
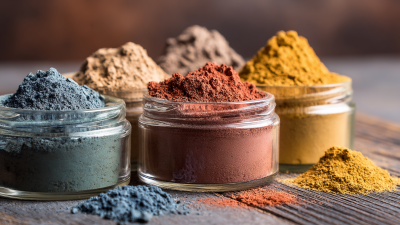
Pigment powder is a fine, insoluble colorant made from mineral, organic, or synthetic particles. Unlike liquid dye, it does not dissolve in resin. It disperses through the mixture. Particle size controls opacity, sparkle, and settling. Heavier particles may sink before curing. Very fine powders can improve coverage but often raise viscosity. I have seen a glossy surface turn grainy when the powder was added too quickly.

Resin behavior depends on wetting, density, and powder concentration. Start with about 0.5–2% pigment by weight, then test a small batch. Add powder gradually while mixing slowly. Scrape the cup walls and inspect the bottom. Poor dispersion creates streaks, dull patches, or floating clumps. Moisture and unknown additives may also affect curing. That part is easy to overlook.

The 2024 MarketsandMarkets Pigments Market report estimates global pigment demand at roughly 27 billion US dollars in 2023, with growth toward about 34 billion dollars by 2028. This scale reflects broad industrial use, not guaranteed resin performance. A pigment suitable for coatings may behave poorly in casting resin. Check the technical data sheet for particle size, heat stability, oil absorption, and recommended loading. A simple test panel remains more reliable than a color chart. My own testing has taught me this: “non-toxic” does not automatically mean resin-compatible.
Match Pigment Types to Your Resin Project

Tip 1: Match the pigment to the resin’s curing method. Mica powder suits epoxy resin when you want soft shimmer, layered waves, or a brushed-metal effect. Opaque pigment powder works better for solid color and strong coverage. For UV resin, use very little pigment. Heavy powder can block ultraviolet light and leave the center tacky.

Tip 2: Consider the project’s thickness and finish. Fine pigment disperses more evenly in thin coating resin. Coarser particles create texture, but they may settle in deep molds. I usually mix a small test batch before filling a detailed mold. It shows whether the color sinks, clumps, or changes during curing. My first ratio is rarely perfect. That is normal.

Tip 3: Check pigment stability, moisture, and resin compatibility. Some powders dull after curing, while others become brighter under clear resin. A tiny amount of fluorescent pigment may suit charms, but it can overpower delicate designs. For transparent pieces, translucent colorants may preserve depth better than opaque powders. Always read the resin’s technical sheet and follow its recommended pigment limit. Add pigment gradually, then scrape the cup’s sides carefully. Uneven mixing often causes cloudy streaks or soft spots.

Use a sample tile.

A practical starting point is a pinch of powder per small resin batch, not a full spoonful. Record the amount, curing time, and final appearance. This simple note prevents guesswork in future projects.

Check Color Strength, Opacity, and Blending Performance

Choosing pigment powder for resin starts with color strength, opacity, and blending performance. A 2024 Grand View Research report valued the global pigments market at about USD 35.7 billion in 2023, showing how widely these materials are used. Yet market growth does not guarantee good resin results. A small amount of strong pigment can overwhelm a clear pour. Start with a 0.1% test batch.

Check the color strength against a white resin sample. ISO 787-16 describes a recognized method for comparing the relative tinting strength of colored pigments. You do not need laboratory equipment for a useful workshop test. Mix equal resin quantities, add measured powder, and compare the cured swatches under daylight. Record the ratio. I still make this mistake: judging wet resin too early.

Opacity depends on particle concentration, particle size, and the resin’s transparency. Cast a thin strip beside a thicker section. If the color disappears in the thin area, the powder may be better for layered effects than solid coverage. Blending performance matters just as much. Rub the powder into a small resin portion before adding it to the full mix. Watch for floating specks, streaks, or settled pigment after ten minutes. A smooth blend can still change during curing. Test it twice.

7 Tips for Choosing Pigment Powder for Resin: Color Strength, Opacity, and Blending Performance

Comparative guide based on typical characteristics of common pigment types. Scores range from 1 to 10, with higher values indicating stronger color, greater opacity, or easier blending in resin. Actual results vary with particle size, pigment concentration, resin clarity, and mixing technique.

Evaluate Particle Size, Purity, and Resin Compatibility

Choosing pigment powder for resin requires more than matching a beautiful color. Particle size affects dispersion, surface texture, and final appearance. Fine particles usually create smoother finishes, while larger particles may produce visible specks or settling. I test a small amount in clear resin before starting a full project. Stir slowly and inspect the mixture under bright, angled light.

Purity matters because fillers, moisture, or unknown additives can weaken color and curing performance. Ask for a current specification sheet and, when available, a certificate of analysis. Check pigment concentration, moisture content, and insoluble residue. Clean powder should not release a strong chemical odor or leave unusual grit. Still, paperwork is not enough. I once trusted a specification sheet and skipped a practical test. The cured surface looked dull.

Resin compatibility deserves equal attention. Mix the pigment with the exact resin and hardener ratio you plan to use. Watch for clumping, thickening, bubbles, slow curing, or color separation after several hours. Test a thin sample and a deeper pour, because behavior can change with thickness. Keep the pigment dry and sealed; humidity can affect both flow and curing. Use a measured ratio rather than guessing. Less pigment often preserves clarity and strength. More color is not always better. Evaluate the cured piece after twenty-four to seventy-two hours, when softness and fading may become easier to notice.

7 Tips for Choosing Pigment Powder for Resin — Evaluate Particle Size, Purity, and Resin Compatibility
Evaluation Area What to Check Practical Benchmark Why It Matters in Resin Recommended Test or Selection Method
1Particle Size Median particle diameter, particle-size distribution, and the presence of coarse agglomerates. Approximately 5–50 µm is a practical range for many resin pigment powders. Finer grades generally disperse more easily. Large particles may settle, create a gritty surface, or produce visible specks. Very fine powders can agglomerate and may require more thorough mixing. Request a particle-size distribution rather than relying only on an average value. Rub a small test batch between gloved fingers and inspect a cured sample under angled light.
2Purity and Contamination Colorant purity, moisture, residual salts, fillers, and metallic or abrasive contaminants. Choose a documented grade with a declared composition and low moisture. For high-clarity applications, avoid powders containing significant inert filler. Impurities can reduce transparency, change viscosity, interfere with curing, or introduce unwanted color shifts and surface defects. Review the technical data sheet and safety data sheet. Weigh a sample before and after gentle drying only when the supplier provides a suitable drying procedure; do not heat unknown powders.
3Resin Compatibility Behavior in epoxy, polyurethane, polyester, or UV-curing resin systems. Run a small compatibility test at 0.5%, 1%, and 3% pigment by weight before production. UV resin requires special attention to light blocking. A pigment that works in epoxy may inhibit or slow UV curing, alter pot life, cause settling, or produce poor dispersion in another resin chemistry. Mix separate test cups, record viscosity and working time, then check cure depth, tackiness, hardness, and color uniformity after full post-cure.
4Color Strength and Loading Tinting strength, opacity, transparency, and the pigment concentration needed to reach the target color. Start with 0.1–1% for highly concentrated colorants and up to 1–5% for many conventional powders. Follow the supplier's maximum loading guidance. Excess powder may make resin brittle, increase viscosity, reduce clarity, trap air, or interfere with curing. Transparent effects usually need much less pigment. Prepare a stepped drawdown or resin series, such as 0.25%, 0.5%, 1%, and 2%, and compare cured color rather than judging only the wet mixture.
5Heat and Light Stability Resistance to temperature exposure, ultraviolet light, oxidation, and color fading. For outdoor or strongly illuminated projects, select pigments with documented lightfastness and temperature performance suitable for the intended service conditions. Some organic colorants can fade or shift, while certain pigments may darken or lose brightness during heat exposure or prolonged UV exposure. Compare a cured control sample with one exposed to the expected light and temperature conditions. Record color change after a defined period instead of relying on an unverified rating.
6Dispersion and Settling Ease of wetting, agglomeration, sedimentation rate, and compatibility with the resin's viscosity. Choose powders that wet out without persistent dry clumps. For low-viscosity resin, select finer particles or use a controlled suspension approach. Poor dispersion produces streaks, uneven opacity, sediment at the mold bottom, and inconsistent color between batches. Pre-mix the powder into a small amount of resin, then blend it into the remaining resin. Observe the mixture after 15 minutes, 1 hour, and the full working time.
7Safety and Handling Dust inhalation risk, skin and eye exposure, ventilation requirements, and storage stability. Use the product's safety data sheet as the controlling reference. Wear suitable gloves and eye protection, avoid creating airborne dust, and keep containers sealed and dry. Powder handling can expose users to respirable particles. Moisture uptake may also cause clumping and inconsistent dosing. Measure carefully in a ventilated area, use local dust control where appropriate, clean with methods that do not disperse powder, and store away from heat, moisture, and incompatible materials.

Note: The stated ranges are practical starting points, not universal specifications. Always verify the pigment powder against the resin manufacturer's technical documentation and conduct a small cured-sample test before production.

Test Small Batches for Reliable Color Results

7 Tips for Choosing Pigment Powder for Resin

Test Small Batches for Reliable Color Results

Tip: Check the powder’s particle size before buying. Fine particles usually blend more evenly and leave fewer gritty spots.

Tip: Confirm compatibility with your resin type. Some pigments behave differently in epoxy, polyurethane, or UV resin. I once trusted a color chart too much. The cured piece looked darker than expected.

Tip: Test a small batch first. Use a measured amount of resin, such as 20 grams, and add pigment gradually.

Tip: Weigh the powder instead of estimating with a spoon. A small excess can reduce transparency or affect curing. Mix slowly for two minutes, scraping the cup sides. Watch for clumps, streaks, or sudden thickening. Small tests save material.

Tip: Cure the sample for the same time and thickness as your final project. A thin test may look different from a deep mold.

Tip: Check the color in daylight and indoor light. Some powders shift noticeably under warm bulbs.

Tip: Record the resin weight, pigment weight, mixing time, and curing result. My early notes were incomplete, which made the second batch harder to repeat. Reliable color comes from repeatable measurements, not guesswork.

Wear suitable gloves and eye protection while handling fine powder.